Customizing Tables with the Table Wizard
When inserting a banquet table, you can select from among various chair models that will be automatically inserted around the banquet table. At the same time that you are adding your table-and-chair configuration, you can also select your table's centerpiece, table setting and even linen color.
- Add a new layout or choose an existing layout to edit. (See Designing a New Layout .)
- Click/tap the Edit button
 in 2D View or 3D View to enable editing.
Result: The Add Item panel opens on the right-hand side of your screen. - On the right side of the screen, select the Table category from your Banquet Library and choose a subcategory such as Rounds, Squares, Rectangles, etc.
- Click/tap the gear icon at the top right of the desired table image.
Result: The Table Wizard opens.
- Access the Table Wizard as described above.
- With the Chair tab selected at the top of the Table Wizard, click/tap the desired chair design that you want to place with this table.
Note: You can also click/tap in the Search Library field and enter any text to locate items in this category containing those characters.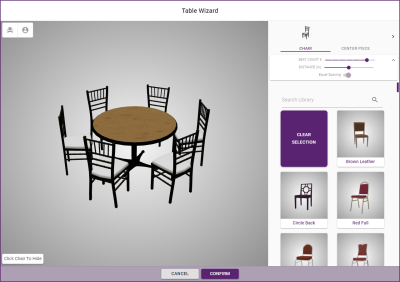
- At the top of the Chair tab, drag the Seat Count and Distance slider tools to set your preference.
Note: The Distance slider moves the chairs closer to or further away from the table. - [Optional] Adjust chair position using the following options:
Note: You can collapse and hide these options by clicking the up arrow at the top right of the panel.- Round Tables
Slide the Equal Spacing toggle to the left to have chairs placed as space allows around a round table as opposed to equally spaced.
Note: This option applies to Round, Oval and High Top tables only.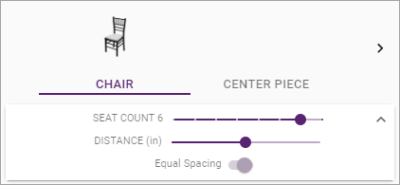
- Non-Round Tables
Slide the Top, Bottom, Left and Right toggles to the left to remove chairs from the corresponding side of the table. Note: The wizard may add chairs to another side of the table in an attempt to keep numbers the same.
Note: This option applies to Square, Rectangular, Serpentine and Half Round tables only.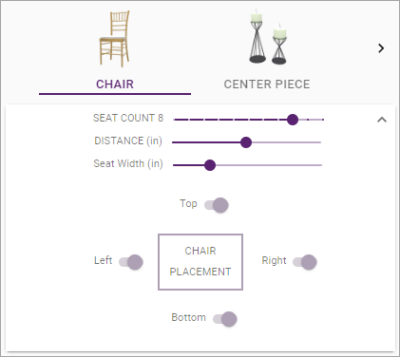
- Round Tables
- [Optional] Click/tap any chair in the wizard to "hide that chair; hidden chairs will leave the space at the table but the chair (and any related place setting) will not be shown on the layout.
Note: Click/tap any hidden chair a second time to show it again.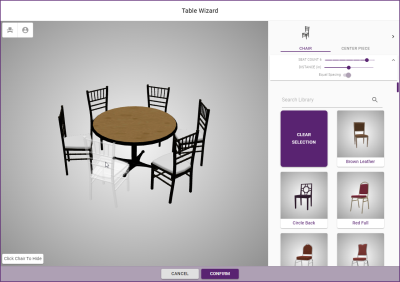
- [Optional] Click/tap the Chair Numbers button
 at the top left of the wizard to show numbers associated with each chair.
Note: A hidden chair will not be numbered, and other numbers will automatically adjust accordingly. - [Optional] Click/tap the Attendees button
 at the top left of the wizard to show attendees at each chair.
Note: Any attendee seated at a hidden chair will be unseated and will need to resat See Importing, Exporting and Seating Guests. - Move on to the next section in this topic or click/tap Confirm at the bottom right to close the wizard and then drag your new table into place in your layout.
- Access the Table Wizard as described above.
- To the right of the Chair tab at the top of the Wizard, click/tap the Center Piece tab.
- Click/tap the desired centerpiece.
Note: You can also click/tap in the Search Library field and enter any text to locate items in this category containing those characters.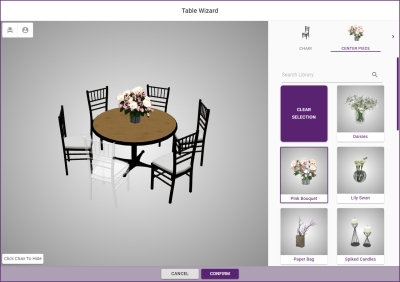
- [Optional] Clear your selected centerpiece by click the purple Clear Selection option at the top of the Centerpieces list.
- Move on to the next section in this topic or click/tap Confirm at the bottom right to close the wizard and then drag your new table into place in your layout.
- Access the Table Wizard as described above.
- To the right of the Center Piece tab at the top right of the Wizard, click/tap the small right arrow to scroll to the right.
Result: The tabs scroll and the Place Setting and Linen tabs now become visible. - Click/tap the Place Setting tab.
- Click/tap the desired place setting.
Note: You can also click/tap in the Search Library field and enter any text to locate items in this category containing those characters.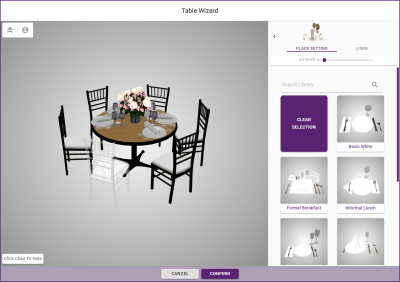
- [Optional] At the top of the Place Setting tab, drag the Distance slider tool to set the desired distance from the edge of the table (in inches).

- Move on to the next section in this topic or click/tap Confirm at the bottom right to close the wizard and then drag your new table into place in your layout.
- Access the Table Wizard as described above.
- Click the Linen tab at the top right.
Note: If the Linen tab is not visible, click/tap the small arrow at the top right of the Wizard to scroll to the right. - Select a linen preference for your table. See the "Creating Custom Linens" section, below, for information on how to create custom linen options.
Note: You can also click/tap in the Search Library field and enter any text to locate items in this category containing those characters.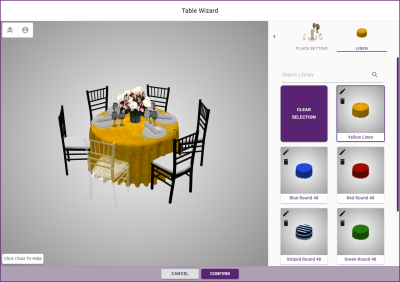
- When finished making your selections, click/tap Confirm at the bottom of the Table Wizard.
Result: The Table Wizard closes and the table in your objects library on the right side of the screen has been customized with your selections. - Click/hold the new table configuration from the Add Item pane and drag it onto your layout.
Note: The gear icon from Step 4, above, will now be purple to indicate this is a customized object.
Tip: You call also add these custom tables to a layout in batch. See Designing a New Layout for more information.
- Access the Table Wizard as described above.
- Click the Linen tab at the top right.
Note: If the Linen tab is not visible, click/tap the small arrow at the top right of the Wizard to scroll to the right. -
Click/tap the Edit (pencil) button at the top left of any linen option.
Result: The Material Editor opens.
Note: New programs offer only one basic white linen option by default.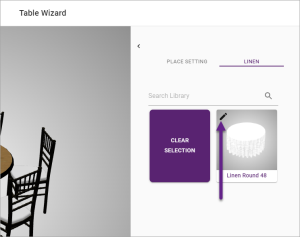
-
In the Details area at the right of the Material Editor, enter a name (and optional label, info label and SKU) for the custom linen you are creating.
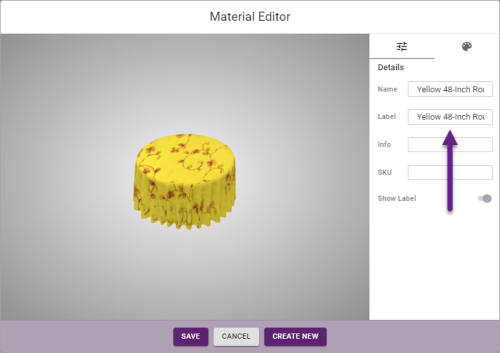
-
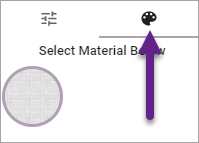
Click/tap the Materials tab (paint pallet) at the top right of the editor.
-
Click/tap the circle underneath "Select Material Below" to select the linen material.
-
Select a color from the standard color pallet or optionally apply advanced material settings:
-
Advanced Settings Toggle
Click this toggle to assign a specific HEX code color for your linen or to adjust other attributes such as transparency, roughness or scale (size of pattern detail). -
Color Toggle
Click this toggle to see a more detailed breakdown of standard color shades. Note: This toggle is only available if the Advanced Settings toggle, above, is switched off. -
Materials
A collection of different materials are available to be applied to various custom objects. For tablecloths, the most applicable would likely be "Fabrics" and "Linens". The toggle labeled Material will expand all groups, although this is likely not necessary when only editing tablecloths. Note: After choosing a fabric or linen for a custom tablecloth, explore Advanced Settings above to change "roughness" (which will adjust color), "scale", etc.
-
-
When finished, click Create New at the bottom of the Material Editor window.
Result: The Material Editor closes and your new custom linen is added to the Linen tab of the Table Wizard.
See Also: